| 1. |
2. |
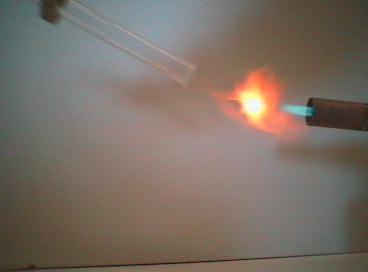
| Experimental setup | Hydrogen is detected using a "lighted splint" test |
| 3. |
4. |
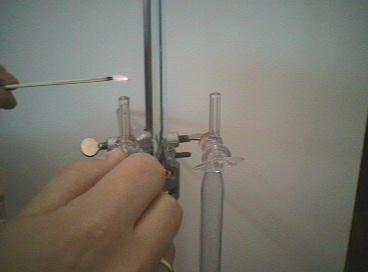
| Check for oxygen using a "glowing splint" test | Oxygen is detected using the "glowing splint" test |
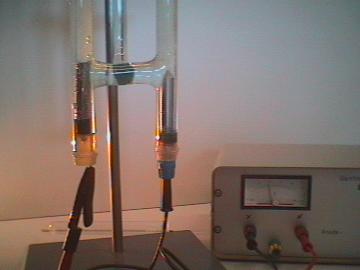
| Photo 1: | Water is broken down into the elements hydrogen and oxygen using a Hoffman's apparatus for electrolysis. The water is colored light blue using nile blue dye. In addition, to increase the conductivity sulfuric acid (electrolyte) is added. Pure water does not conduct electricity. |
| Photo 2: | We can detect hydrogen using the so-called "lighted splint" test, in which an open flame is held near the opening of the tube suspected to contain hydrogen. If hydrogen is present, the gas ignites. |
| Photo 3: | We can check for oxygen using the so-called "glowing splint" test. A glowing splint is held over the tube containing oxygen. If oxygen is present, the splint reignites. |
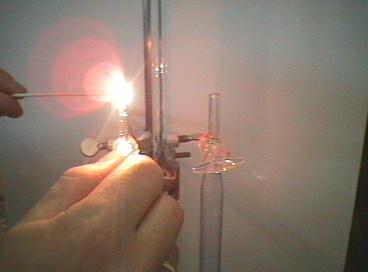
| Photo 4: | When the spigot is opened, the glowing splint flares up, indicating
that oxygen is indeed present.
The basic pricinciple of electrolysis is that the application of an electrical current can force a reaction to take place in the direction opposite to that in which it would spontaneously occur. The breakup of water into its constituent elements shown here is the reverse of the (spontaneous) reaction of hydrogen and oxygen to form water. The following two reactions take place at the poles: Cathode: 2 H2O + 2 e-
> H2 + 2 OH-
|